
Nearly 80% of exterior masonry damage begins with water entering small cracks or failed mortar joints. To repair brickwork properly, inspect the wall, identify loose bricks and deteriorated joints, and gather the right tools before removing anything. You’ll need matching bricks, compatible mortar, a joint raker, chisel, trowel, brush, and protective equipment. Careful preparation prevents further damage, but the most important decision comes next: determining how much material you can safely remove.
Assess Brick Damage and Gather Repair Tools
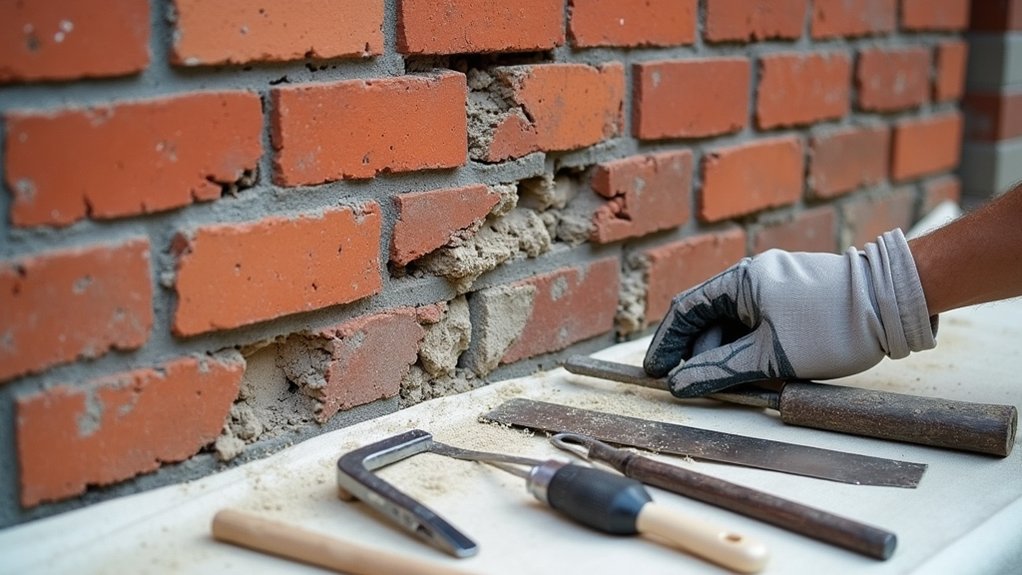
Before you begin repairs, inspect the wall closely to identify cracked, spalled, loose, or missing bricks and deteriorated mortar joints. Map each defect with chalk, photograph the elevations, and note moisture stains, bulging areas, efflorescence, and recurring cracks.
Tap questionable bricks lightly with a wooden handle; a hollow sound can indicate hidden separation, but don’t disturb them yet. Check the building’s age, brick dimensions, color, texture, and existing mortar hardness.
Historical preservation requires matching the original appearance and construction methods, not simply choosing the strongest modern product. For Material compatibility, plan to compare replacement brick density and mortar strength before purchasing supplies.
Gather safety glasses, gloves, a dust mask, flashlight, camera, tape measure, masonry ruler, inspection mirror, chalk, and labeled sample bags. Keep records for accurate planning and consultation.
Remove Damaged Bricks and Crumbling Mortar
Once you’ve documented the defects and confirmed the repair plan, remove loose bricks and failing mortar carefully to avoid damaging sound masonry. Wear safety glasses, gloves, and a dust mask, then protect nearby surfaces with sheeting.
Score the mortar joints around a damaged brick using a narrow cold chisel or oscillating tool. Work gradually, striking lightly and keeping the tool angled toward the joint, not the surrounding brick. Lift out loosened pieces by hand; never force a stable brick.
Brush debris from the cavity and vacuum remaining dust without widening sound joints. For Historical brick preservation, avoid aggressive grinders and retain original bricks whenever they’re structurally sound.
If dust could enter an Interior wall treatment or occupied room, seal openings and maintain ventilation. Stop if you uncover movement, deep cracking, or hidden moisture.
Replace Bricks and Repoint Mortar Joints
With the cavity clean and stable, set a replacement brick that matches the original in size, color, texture, and absorption. Check color matching in daylight, then dampen the cavity and brick lightly to prevent rapid moisture loss.
Mix mortar to match the existing joint’s color, strength, and composition; don’t use a harder mix on older masonry. Apply mortar to the bed and both ends, leaving enough space for the head joints.
Press the brick into position, align its face with neighboring courses, and tool away excess mortar. Maintain consistent joint widths and keep mortar off the brick surface.
Wear gloves, eye protection, and a dust mask, and follow appropriate safety precautions when cutting or mixing materials. Remove smears carefully with a stiff brush before the mortar firms.
Cure, Finish, and Prevent Further Brick Damage
Let the new mortar cure slowly by protecting it from direct sun, wind, and freezing temperatures. Mist it lightly as needed to prevent premature drying, but don’t saturate the joints. Keep the area covered for at least 48 hours, extending protection during cold or dry weather.
Once the mortar has firmed, brush away loose crumbs with a soft-bristle brush. Avoid pressure washing, acidic cleaners, and aggressive brick cleaning until the joints have cured fully, typically 28 days.
Then remove mortar smears with a masonry-safe cleaner, testing it on an inconspicuous area first. Don’t apply mortar sealing products unless the manufacturer confirms compatibility; breathable masonry should release moisture.
Inspect annually for cracks, open joints, leaks, and damaged flashing. Repair minor defects promptly, maintain gutters and downspouts, and keep sprinklers away from brickwork.
Frequently Asked Questions
When Should I Hire a Professional Mason for Exterior Brick Repairs?
Hire a professional mason when you see widespread cracking, bulging walls, loose bricks, deep mortar deterioration, water intrusion, or damage near structural openings.
You should also call one if repairs exceed your skill level, involve scaffolding, or require matching historic masonry.
Although DIY techniques may handle minor repointing, common mistakes can trap moisture or weaken the wall.
A mason can diagnose underlying movement, select compatible mortar, and complete durable, safe repairs.
Do I Need Planning Permission to Repair or Alter Exterior Brickwork?
You usually won’t need planning permission for like-for-like brick repairs or repointing, but you should check locally before altering appearance, openings, walls, or structure.
About 20% of listed buildings in England contain historic masonry, making Historical preservation rules important. Contact your planning department if your property is listed, lies in a conservation area, or has a protective covenant.
You must still meet Building code compliance requirements, especially for structural changes, insulation, drainage, and safety.
How Much Does Professional Brickwork Repair Typically Cost?
Professional brickwork repair typically costs £500–£3,000 for minor to moderate work, while extensive structural repairs can exceed £10,000.
Your cost estimates depend on area size, brick matching, access, scaffolding, damage severity, and whether you need repointing or rebuilding.
Pricing factors also include regional labour rates, materials, waste removal, and emergency work.
Ask contractors for itemised quotations, confirm insurance, and compare at least three reputable specialists before choosing.
Can Damaged Brickwork Affect My Home’s Structural Integrity or Safety?
A stitch in time saves nine: yes, damaged brickwork can threaten your home’s structural integrity and safety. Brick deterioration may allow water into walls, weaken mortar, cause cracking, and shift masonry.
Watch for bulging walls, wide or growing cracks, loose bricks, leaning chimneys, and damp interiors. Don’t ignore falling debris or unstable areas.
Arrange a professional inspection promptly, especially near openings or foundations, and restrict access until a qualified mason confirms masonry safety.
Are There Insurance Considerations for Repairing Exterior Brick Damage?
Yes, insurance may help, but your policy’s cause-of-loss terms control eligibility. Review Insurance claims procedures and coverage considerations before starting repairs.
Document damage with dated photographs, contractor estimates, inspection reports, and maintenance records.
Notify your insurer promptly, and ask whether an adjuster must inspect the property first.
Policies often exclude gradual deterioration, poor maintenance, or faulty construction, while sudden storm or impact damage may qualify.
Don’t authorize extensive work before receiving written guidance.
Conclusion
With careful inspection, controlled removal, and properly matched materials, you can restore damaged exterior brickwork without compromising sound masonry. Reinstall each brick securely, pack and tool the joints consistently, then protect the repair while mortar cures. Why risk repeating the damage? Keep gutters, flashing, and drainage clear, maintain ventilation, and address small cracks promptly. Finally, document the completed work, materials, and dates so future repairs remain accurate, compatible, and easier to manage.